

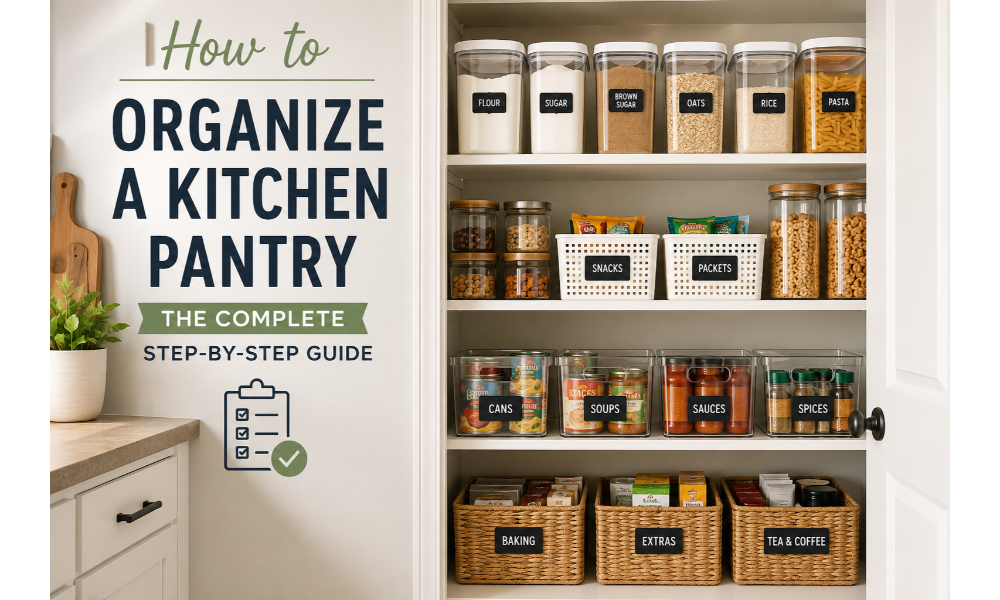
A cluttered pantry costs you more than just time spent hunting for the cumin. It leads to duplicate purchases, forgotten food that expires before you use it, and a kitchen that feels chaotic no matter how clean the counters are. The good news is that organizing a pantry isn’t about buying a matching set of expensive containers — it’s about building a system that matches how you actually cook and shop. Here’s how to do it properly, from the first empty box to long-term upkeep.
Step 1: Empty Everything Out
Before you organize anything, take everything off the shelves. This is the only way to see what you actually have, and it’s the step most people try to skip. Set up a staging area on a counter or table, and sort items into rough piles as you go: baking, canned goods, snacks, grains and pasta, spices, breakfast items, and so on.
While you’re at it, wipe down every shelf. Pantries collect crumbs, sticky spills, and dust in corners you never look at directly, and it’s much easier to clean an empty shelf than to work around a cluttered one.
Step 2: Purge Ruthlessly
As you sort, check expiration dates and toss anything expired, stale, or that you know you’ll never use. A realistic gut check: if it’s been sitting untouched for over a year, it’s probably not part of your actual cooking rotation.
Common culprits worth checking:
- Spices older than two to three years (they lose potency, not safety, but they’re doing nothing for your food)
- Opened bags of flour, rice, or grains that may have attracted pantry moths
- Duplicate condiments or half-used baking supplies
- Novelty gifts or impulse buys you never got around to cooking with
Donate unopened, non-perishable items you won’t use to a local food bank rather than tossing them.
Step 3: Group Like With Like
Once you know what’s staying, decide on categories that reflect how you cook, not an arbitrary Pinterest layout. Typical groupings include:
- Baking supplies (flour, sugar, baking soda, extracts)
- Canned goods and jarred sauces
- Grains, pasta, and rice
- Snacks
- Breakfast foods (cereal, oatmeal, granola bars)
- Oils, vinegars, and condiments
- Spices and seasonings
- Backstock and bulk items
If you have kids, consider a low, easy-to-reach shelf just for their snacks so they’re not asking you to reach the top shelf every afternoon.
Step 4: Assign Zones Based on Frequency and Weight
Pantry real estate isn’t equal. Eye-level shelves are prime space — save them for everyday items you reach for constantly, like oils, snacks, and pasta. Lower shelves should hold heavier items (canned goods, bulk flour, appliances) since they’re easier and safer to lift from a lower position. High shelves are best for backstock, seasonal items, or things you use only occasionally, like a large stockpot or holiday baking supplies.
Step 5: Choose the Right Containers
Decanting dry goods into clear, airtight containers is the single biggest visual and functional upgrade you can make. Benefits include:
- Better freshness and pest prevention than flimsy bags and boxes
- Instant visibility into what you have and how much is left
- Uniform shapes that stack and fit shelves more efficiently
You don’t need to decant everything. Focus on high-volume staples: flour, sugar, rice, pasta, oats, cereal, and baking mixes. Label each container with the contents and, if you like, the expiration date using a simple label maker or chalkboard labels.
For canned goods, a step-shelf riser or a dedicated can rack lets you see every label at a glance instead of digging through a stack.
Step 6: Use Vertical Space and Add-On Storage
Most pantries waste vertical space. A few additions make a big difference:
- Shelf risers double usable space on a single shelf without adding new shelving.
- Door-mounted racks turn unused door space into storage for spices, foil, or snack packets.
- Lazy Susans solve the problem of deep shelves and awkward corners — great for oils, sauces, and condiments.
- Stackable bins keep loose items like snack bags or pouches corralled instead of sliding around.
- Under-shelf baskets hang beneath an existing shelf to add a slim storage layer for flat items.
Step 7: Label Everything
Labels aren’t just for aesthetics. They help everyone in the household put things back where they belong, which is the real key to keeping a pantry organized long-term. Label shelves themselves (not just containers) if multiple people share the kitchen, so “snacks” and “baking” have a clearly defined home.
Step 8: Build a Maintenance Routine
Organizing is only half the job — the system has to survive daily use. A few habits keep it that way:
- Do a five-minute tidy-up once a week, pushing items back into their zones.
- Rotate stock so older items move to the front (first in, first out) when you restock.
- Do a deeper purge every three to six months to catch expired items before they pile up.
- Keep a running grocery list on the pantry door or your phone so you can note when something runs low, preventing the pantry from becoming a graveyard of half-empty containers.
Common Pantry Organizing Mistakes to Avoid
- Buying containers before purging. You’ll end up with the wrong sizes for what actually remains.
- Over-organizing for a life you don’t have. A rotating spice rack sounds nice, but if you use five spices regularly, a simple labeled shelf works better than a 40-jar system.
- Ignoring frequency of use. Don’t put everyday items on the highest shelf just because it looks tidy from a distance.
- Skipping labels. Even a perfectly sorted pantry falls apart within weeks if nothing is labeled and other household members don’t know the system.
Final Thoughts
A well-organized pantry isn’t a one-time project — it’s a system built around how you actually shop, cook, and eat. Start with a full purge, group items intentionally, invest in a few key containers and organizers, and commit to a light weekly reset. Do that, and your pantry will stay functional long after the initial burst of organizing energy fades.
Frequently Asked Questions
How long does organizing a full pantry actually take?
For an average pantry, budget half a day for the purge, sort, and container-filling steps. A walk-in or particularly cluttered pantry can take a full day, especially if you’re also cleaning shelves and measuring for new containers.
Do I need to buy matching containers for it to work?
No. Matching containers look nice in photos, but function matters more than uniformity. Any clear, airtight container that fits your shelf height works — mismatched jars you already own are a perfectly good starting point.
What’s the best way to organize a pantry with no shelves, just a closet?
Add wire or wood shelving in adjustable increments so you can customize spacing as your storage needs change, then apply the same category-based zoning described above. A door-mounted rack adds a surprising amount of extra storage in a shelf-free closet.
How do I stop the pantry from getting messy again within a month?
The system fails when items don’t have a single obvious home. Double-check that every zone is labeled, keep a five-minute weekly reset on your calendar, and involve everyone in the household in where things go back — a system only one person understands won’t survive daily use.
Should spices go in the pantry or somewhere else?
Spices are one of the few items better suited to a cabinet or drawer near the stove rather than the pantry itself, since you’ll use them mid-cooking and don’t want to walk across the kitchen. If your only storage option is the pantry, keep them on a shelf close to eye level near the entrance.